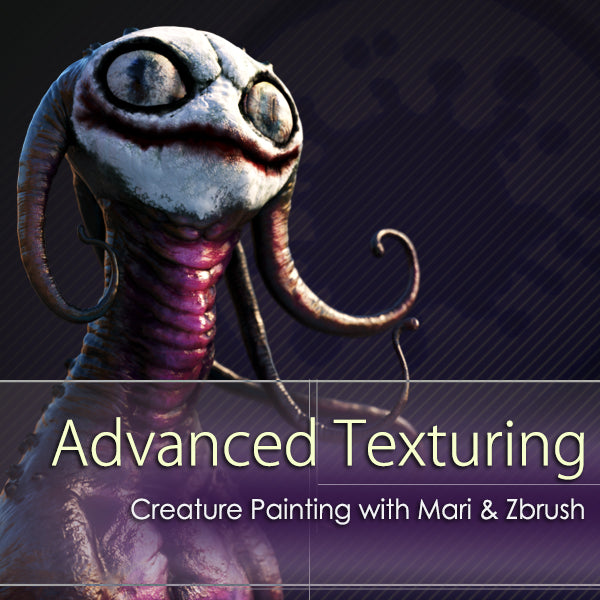
We'll begin this series by covering all the steps necessary to generate good UV's for texturing, spending extra time discussing multi-tile UV workflows using a combination of Zbrush, Maya, and headus UV layout.
From there we will move into Mari, and discuss all of the major pallets starting with the Lighting and object tabs. From there we will continue on through the plethora of masking options taking extra care to discuss the paint buffer, and how to make sure we're getting the most out of our texture painting,
We will cover various methods of blending our textures and using things like ambient occlusion, before diving into the many procedural textures and noises available in Mari.
Then its on the the heart of the matter where we go over different texture painting techniques using a combination of hand painted textures using the built in brush sets, as well as using photographs as textures with the paint images tool, and bring it home with a discussion on how to generate different channels like spec, sub surface masking, and various other masks for later use in Maya.
To close things out we will learn how to take the maps we created in Mari, and use them to generate a final pass of fine detail in Zbrush before generating our displacement maps.
--
Related Products
-
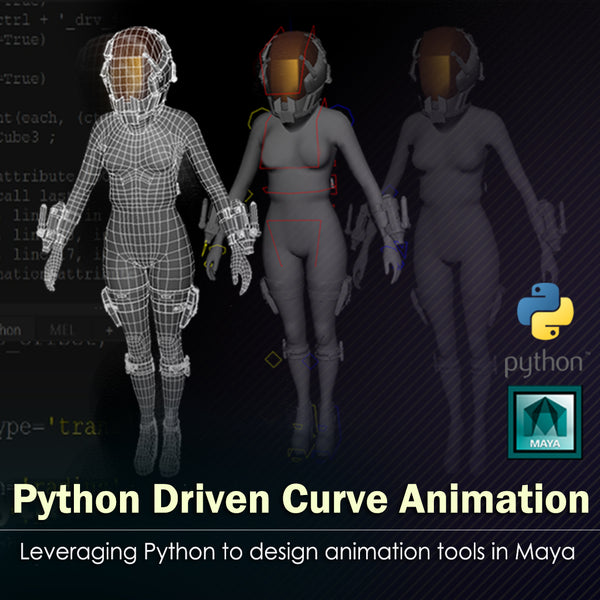
{"id":4626626445412,"title":"Python Driven Curve Animation","handle":"python-driven-curve-animation","description":"\u003cp\u003e[embed]https:\/\/vimeo.com\/382983119[\/embed]\u003c\/p\u003e\u003cbr\u003e--\u003cbr\u003e\u003cp\u003e[embed]https:\/\/vimeo.com\/382983119[\/embed]\u003c\/p\u003e\n\n\u003cp\u003e \u003c\/p\u003e\n\n\u003cp\u003eHello everyone this is Timothy Hanson from MAXDEPTH.tv, and I’m happy to introduce you to our latest tutorial “Python Driven Curve Animation” created and narrated by my friend and colleague Delano Athias.\u003c\/p\u003e\n\n\u003cp\u003eIf you find yourself animating creatures that fly, slither, and grow along a spline very often, it makes sense to create a system to set up these kinds of actions with minimal effort. In this course, we will learn how to leverage Python to design a tool in Maya that will allow you attach objects to a curve in a more efficient manner with greater control.\u003c\/p\u003e\n\n\u003cp\u003eWe'll start the tutorial by prototyping our tool, to manually connect items to a path. From there, we'll build a simplified version of the tool, and end the course by designing an intuitive UI to make the system user-friendly.\u003c\/p\u003e\n\n\u003cp\u003eSo if you’re an Intermediate to Advanced Maya user that would like to learn how Python can be used to improve productivity then this is the tutorial for you!\u003c\/p\u003e","published_at":"2020-05-08T18:07:36-07:00","created_at":"2020-05-08T12:51:48-07:00","vendor":"MAXDEPTH.tv","type":"","tags":["animation","Maya","on sale","python"],"price":2999,"price_min":2999,"price_max":2999,"available":true,"price_varies":false,"compare_at_price":4999,"compare_at_price_min":4999,"compare_at_price_max":4999,"compare_at_price_varies":false,"variants":[{"id":32038479036516,"title":"Default Title","option1":"Default Title","option2":null,"option3":null,"sku":"","requires_shipping":false,"taxable":false,"featured_image":null,"available":true,"name":"Python Driven Curve Animation","public_title":null,"options":["Default Title"],"price":2999,"weight":0,"compare_at_price":4999,"inventory_management":null,"barcode":"","requires_selling_plan":false,"selling_plan_allocations":[]}],"images":["\/\/www.maxdepth.tv\/cdn\/shop\/products\/MAXDEPTH_PythonForAnimation_Main-INSTA.jpg?v=1589020903"],"featured_image":"\/\/www.maxdepth.tv\/cdn\/shop\/products\/MAXDEPTH_PythonForAnimation_Main-INSTA.jpg?v=1589020903","options":["Title"],"media":[{"alt":null,"id":6634686742628,"position":1,"preview_image":{"aspect_ratio":1.333,"height":360,"width":480,"src":"\/\/www.maxdepth.tv\/cdn\/shop\/products\/hqdefault_b26237c4-3a97-4383-96fd-0981ac707911.jpg?v=1589020843"},"aspect_ratio":1.334,"external_id":"QM_J5XHPl1c","host":"youtube","media_type":"external_video"},{"alt":null,"id":6634689855588,"position":2,"preview_image":{"aspect_ratio":1.0,"height":1080,"width":1080,"src":"\/\/www.maxdepth.tv\/cdn\/shop\/products\/MAXDEPTH_PythonForAnimation_Main-INSTA.jpg?v=1589020903"},"aspect_ratio":1.0,"height":1080,"media_type":"image","src":"\/\/www.maxdepth.tv\/cdn\/shop\/products\/MAXDEPTH_PythonForAnimation_Main-INSTA.jpg?v=1589020903","width":1080}],"requires_selling_plan":false,"selling_plan_groups":[],"content":"\u003cp\u003e[embed]https:\/\/vimeo.com\/382983119[\/embed]\u003c\/p\u003e\u003cbr\u003e--\u003cbr\u003e\u003cp\u003e[embed]https:\/\/vimeo.com\/382983119[\/embed]\u003c\/p\u003e\n\n\u003cp\u003e \u003c\/p\u003e\n\n\u003cp\u003eHello everyone this is Timothy Hanson from MAXDEPTH.tv, and I’m happy to introduce you to our latest tutorial “Python Driven Curve Animation” created and narrated by my friend and colleague Delano Athias.\u003c\/p\u003e\n\n\u003cp\u003eIf you find yourself animating creatures that fly, slither, and grow along a spline very often, it makes sense to create a system to set up these kinds of actions with minimal effort. In this course, we will learn how to leverage Python to design a tool in Maya that will allow you attach objects to a curve in a more efficient manner with greater control.\u003c\/p\u003e\n\n\u003cp\u003eWe'll start the tutorial by prototyping our tool, to manually connect items to a path. From there, we'll build a simplified version of the tool, and end the course by designing an intuitive UI to make the system user-friendly.\u003c\/p\u003e\n\n\u003cp\u003eSo if you’re an Intermediate to Advanced Maya user that would like to learn how Python can be used to improve productivity then this is the tutorial for you!\u003c\/p\u003e"}
-
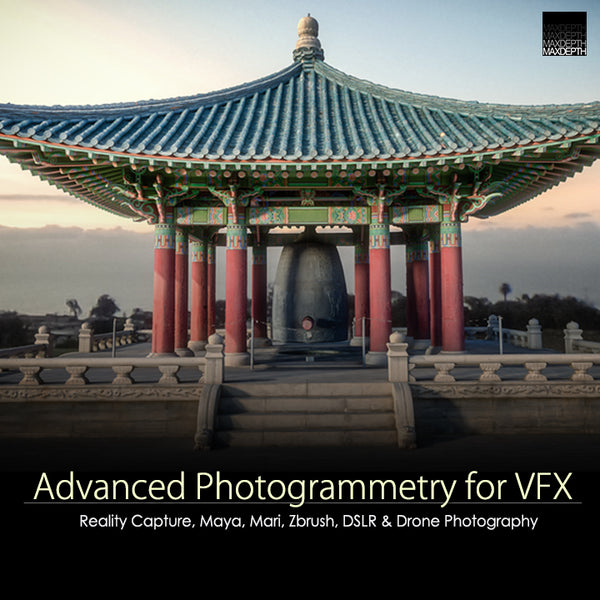
{"id":4626626347108,"title":"Advanced Photogrammetry for VFX","handle":"advanced-photogrammetry-for-vfx","description":"\u003cp style=\"padding-left: 30px;\"\u003e \u003ciframe src=\"https:\/\/www.youtube.com\/embed\/WoyszLncq8w\" allow=\"accelerometer; autoplay; encrypted-media; gyroscope; picture-in-picture\" allowfullscreen=\"\" width=\"560\" height=\"315\" frameborder=\"0\"\u003e\u003c\/iframe\u003e\u003cspan id=\"yui_3_16_0_ym19_1_1543312638333_3432\"\u003e\u003c\/span\u003e\u003c\/p\u003e\n\u003cp\u003e\u003cspan id=\"yui_3_16_0_ym19_1_1543312638333_3432\"\u003eWith\u003c\/span\u003e\u003cspan id=\"yui_3_16_0_ym19_1_1543312638333_3432\"\u003e over four hours of in depth hands on training I'll also be giving you over 1,600 high resolution images so you can follow along. Together we will create some breathtaking photogrammetry using the groundbreaking new software Reality Capture. \u003c\/span\u003e\u003c\/p\u003e\n\u003cspan id=\"yui_3_16_0_ym19_1_1543312638333_3432\"\u003e\u003c\/span\u003e \u003cbr\u003e\u003cspan id=\"yui_3_16_0_ym19_1_1543312638333_3432\"\u003eWe begin with an introduction to the gear you'll need for photogrammetry, and then segue into the principals of photography. We will talk about shooting with DSLR's and the DJI Mavic 2 Pro drone focusing on the big three Aperture, ISO, and shutter speed. We'll break down the way they work together and against each other in the pursuit of the perfect exposure. \u003c\/span\u003e\n\u003cp\u003e\u003cspan id=\"yui_3_16_0_ym19_1_1543312638333_3432\"\u003e\u003cbr id=\"yiv8057517567yui_3_16_0_ym19_1_1543229256921_2535\"\u003eFrom there we will start with the first of three case studies focusing on variables you'll encounter in your own quest for the perfect photogrammetry data set. \u003c\/span\u003e\u003c\/p\u003e\n\u003cp\u003e\u003cspan id=\"yui_3_16_0_ym19_1_1543312638333_3432\"\u003eWe will focus first on the ideal situation created by shooting in a studio environment. Using soft boxes and a turntable we can control our photoshoot giving us the best results. Next we will break down how to make the most of an imperfect shooting environment. Lastly we head into our master project recreating an ornately detailed architectural landmark. \u003cbr id=\"yiv8057517567yui_3_16_0_ym19_1_1543229256921_2536\"\u003e\u003cbr id=\"yiv8057517567yui_3_16_0_ym19_1_1543229256921_2537\"\u003eAlong the way we will touch on re-topology and mesh cleanup in Zbrush, as well as perfecting our textures in Mari before ultimately creating our final renders in Vray for Maya. \u003c\/span\u003e\u003c\/p\u003e\n\u003cp\u003e\u003cspan id=\"yui_3_16_0_ym19_1_1543312638333_3432\"\u003e\u003cbr id=\"yiv8057517567yui_3_16_0_ym19_1_1543229256921_2538\"\u003e\u003c\/span\u003eYou can view the trailer at \u003ca href=\"https:\/\/vimeo.com\/303033682\"\u003ehttps:\/\/vimeo.com\/303033682\u003c\/a\u003e\u003c\/p\u003e\n\u003cp\u003eAs always we encourage you to follow us on social media!\u003c\/p\u003e\n\u003cp\u003eYou can find us on Facebook, Twitter, and Instagram.\u003c\/p\u003e\n\u003cp\u003eIf you have any questions about this or any of our other tutorials feel free to send us an email.\u003c\/p\u003e\n\u003cp\u003eThank you for choosing our tutorials!\u003c\/p\u003e","published_at":"2020-05-08T18:07:33-07:00","created_at":"2020-05-08T12:51:47-07:00","vendor":"MAXDEPTH.tv","type":"","tags":["Mari","Maya","Photogrammetry","reality capture","vray","zbrush"],"price":7999,"price_min":7999,"price_max":7999,"available":true,"price_varies":false,"compare_at_price":8999,"compare_at_price_min":8999,"compare_at_price_max":8999,"compare_at_price_varies":false,"variants":[{"id":32038478938212,"title":"Default Title","option1":"Default Title","option2":null,"option3":null,"sku":"1006","requires_shipping":false,"taxable":false,"featured_image":null,"available":true,"name":"Advanced Photogrammetry for VFX","public_title":null,"options":["Default Title"],"price":7999,"weight":0,"compare_at_price":8999,"inventory_management":null,"barcode":"","requires_selling_plan":false,"selling_plan_allocations":[]}],"images":["\/\/www.maxdepth.tv\/cdn\/shop\/products\/MXD_AdvancedPhotogrammetry_Insta.jpg?v=1589055438"],"featured_image":"\/\/www.maxdepth.tv\/cdn\/shop\/products\/MXD_AdvancedPhotogrammetry_Insta.jpg?v=1589055438","options":["Title"],"media":[{"alt":null,"id":6636996624484,"position":1,"preview_image":{"aspect_ratio":1.0,"height":720,"width":720,"src":"\/\/www.maxdepth.tv\/cdn\/shop\/products\/MXD_AdvancedPhotogrammetry_Insta.jpg?v=1589055438"},"aspect_ratio":1.0,"height":720,"media_type":"image","src":"\/\/www.maxdepth.tv\/cdn\/shop\/products\/MXD_AdvancedPhotogrammetry_Insta.jpg?v=1589055438","width":720}],"requires_selling_plan":false,"selling_plan_groups":[],"content":"\u003cp style=\"padding-left: 30px;\"\u003e \u003ciframe src=\"https:\/\/www.youtube.com\/embed\/WoyszLncq8w\" allow=\"accelerometer; autoplay; encrypted-media; gyroscope; picture-in-picture\" allowfullscreen=\"\" width=\"560\" height=\"315\" frameborder=\"0\"\u003e\u003c\/iframe\u003e\u003cspan id=\"yui_3_16_0_ym19_1_1543312638333_3432\"\u003e\u003c\/span\u003e\u003c\/p\u003e\n\u003cp\u003e\u003cspan id=\"yui_3_16_0_ym19_1_1543312638333_3432\"\u003eWith\u003c\/span\u003e\u003cspan id=\"yui_3_16_0_ym19_1_1543312638333_3432\"\u003e over four hours of in depth hands on training I'll also be giving you over 1,600 high resolution images so you can follow along. Together we will create some breathtaking photogrammetry using the groundbreaking new software Reality Capture. \u003c\/span\u003e\u003c\/p\u003e\n\u003cspan id=\"yui_3_16_0_ym19_1_1543312638333_3432\"\u003e\u003c\/span\u003e \u003cbr\u003e\u003cspan id=\"yui_3_16_0_ym19_1_1543312638333_3432\"\u003eWe begin with an introduction to the gear you'll need for photogrammetry, and then segue into the principals of photography. We will talk about shooting with DSLR's and the DJI Mavic 2 Pro drone focusing on the big three Aperture, ISO, and shutter speed. We'll break down the way they work together and against each other in the pursuit of the perfect exposure. \u003c\/span\u003e\n\u003cp\u003e\u003cspan id=\"yui_3_16_0_ym19_1_1543312638333_3432\"\u003e\u003cbr id=\"yiv8057517567yui_3_16_0_ym19_1_1543229256921_2535\"\u003eFrom there we will start with the first of three case studies focusing on variables you'll encounter in your own quest for the perfect photogrammetry data set. \u003c\/span\u003e\u003c\/p\u003e\n\u003cp\u003e\u003cspan id=\"yui_3_16_0_ym19_1_1543312638333_3432\"\u003eWe will focus first on the ideal situation created by shooting in a studio environment. Using soft boxes and a turntable we can control our photoshoot giving us the best results. Next we will break down how to make the most of an imperfect shooting environment. Lastly we head into our master project recreating an ornately detailed architectural landmark. \u003cbr id=\"yiv8057517567yui_3_16_0_ym19_1_1543229256921_2536\"\u003e\u003cbr id=\"yiv8057517567yui_3_16_0_ym19_1_1543229256921_2537\"\u003eAlong the way we will touch on re-topology and mesh cleanup in Zbrush, as well as perfecting our textures in Mari before ultimately creating our final renders in Vray for Maya. \u003c\/span\u003e\u003c\/p\u003e\n\u003cp\u003e\u003cspan id=\"yui_3_16_0_ym19_1_1543312638333_3432\"\u003e\u003cbr id=\"yiv8057517567yui_3_16_0_ym19_1_1543229256921_2538\"\u003e\u003c\/span\u003eYou can view the trailer at \u003ca href=\"https:\/\/vimeo.com\/303033682\"\u003ehttps:\/\/vimeo.com\/303033682\u003c\/a\u003e\u003c\/p\u003e\n\u003cp\u003eAs always we encourage you to follow us on social media!\u003c\/p\u003e\n\u003cp\u003eYou can find us on Facebook, Twitter, and Instagram.\u003c\/p\u003e\n\u003cp\u003eIf you have any questions about this or any of our other tutorials feel free to send us an email.\u003c\/p\u003e\n\u003cp\u003eThank you for choosing our tutorials!\u003c\/p\u003e"}
-
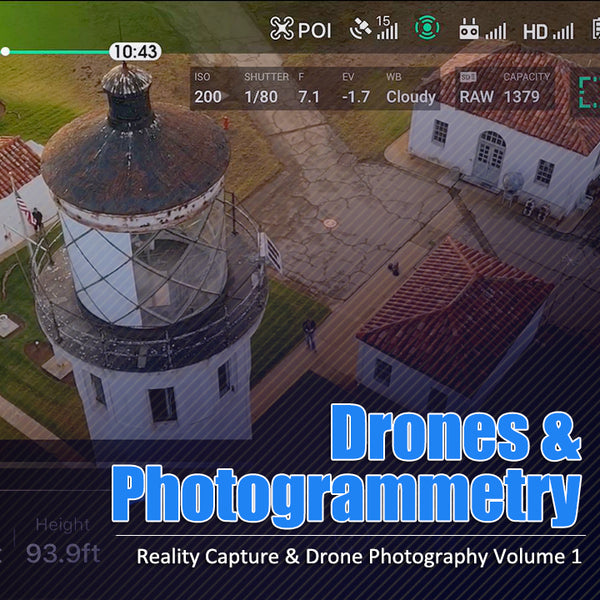
{"id":4626626412644,"title":"Drones \u0026 Photogrammetry: Reality Capture Volume One","handle":"drones-photogrammetry-reality-capture-volume-one","description":"\u003cp\u003e \u003c\/p\u003e\n\u003cp\u003eChapter 1) Intro and disclaimer\u003c\/p\u003e\n\u003cp\u003eChapter 2) Inflight drone image capture walk through\u003c\/p\u003e\n\u003cp\u003eChapter 3) Image prep in Adobe Lightroom\u003c\/p\u003e\n\u003cp\u003eChapter 4) Reality Capture \u0026amp; control point workflow\u003c\/p\u003e\n\u003cp\u003eChapter 5) Mesh reconstruction \u0026amp; cleanup\u003c\/p\u003e\n\u003cp\u003eChapter 6) Generating UV's \u0026amp; textures\u003c\/p\u003e\n\u003cp\u003eChapter 7) Zbrush retopology with Zremesher\u003c\/p\u003e\n\u003cp\u003eChapter 8) Zbrush retopology with Dynamesh\u003c\/p\u003e\n\u003cp\u003eChapter 9) Zbrush Uvmaster using Polygroups\u003c\/p\u003e\n\u003cp\u003eChapter 10) Finalizing UV's with Headus and Maya\u003c\/p\u003e\n\u003cp\u003eChapter 11) Generating displacement maps in Zbrush\u003c\/p\u003e\n\u003cp\u003eChapter 12) Final remodeling and touchups in Maya\u003c\/p\u003e\n\u003cp\u003eChapter 13) Final texture touchups in Mari\u003c\/p\u003e\n\u003cp\u003eChapter 14) Final render in Arnold for Maya\u003cbr\u003e\u003c\/p\u003e\n\u003cp\u003e \u003c\/p\u003e\n\u003cp\u003eHello, this is Timothy Hanson from Maxdepth.tv, and today we are going to be focusing on using drones as a tool to create some fantastic 3d assets. In this training series, we will focus on using the DJI Mavic 2 pro as well as traditional DSLRs to capture a data set for use in photogrammetry software Reality Capture.\u003c\/p\u003e\n\u003cbr\u003e\n\u003cp\u003eFrom there I will show you how to implement what I like to call \"The control point method\" to align your data set into a beautiful point cloud as well as some tips and tricks to help optimize your scenes. From there we will head on over into Zbrush for some retopology techniques using Zremesher and Dynamesh, as well as a system for harnessing the power of polygroups to organize our UV's.\u003c\/p\u003e\n\u003cbr\u003e\n\u003cp\u003eNext we will jump into Maya for a demonstration on remodeling some problem areas of our mesh. The next step is to work on some final UV tweaking and layout before taking our textures into Mari for some finishing touches.\u003c\/p\u003e\n\u003cbr\u003e\n\u003cp\u003eClosing things out we'll have a walk through in Maya taking everything we've created and using it to build a photorealistic shader network in Arnold that looks so realistic you'd have never guessed it started with a drone. Head on over to maxdepth.tv to pick up your copy of \"Drones \u0026amp; Photogrammetry\" today. Thanks! \u003c\/p\u003e\n\u003cbr\u003e\u003c!-- wp:paragraph --\u003e \u003cbr\u003e\n\u003cp\u003eYou can view the trailer at \u003ca href=\"https:\/\/vimeo.com\/379730542\"\u003ehttps:\/\/vimeo.com\/379730542\u003c\/a\u003e\u003c\/p\u003e\n\u003cbr\u003e\u003c!-- \/wp:paragraph --\u003e\n\u003cp\u003e\u003c!-- wp:paragraph --\u003e \u003cbr\u003e\u003c\/p\u003e\nAs always we encourage you to follow us on social media! You can find us on Facebook, Twitter, and Instagram. If you have any questions about this or any of our other tutorials feel free to send us an email. \u003cbr\u003e\u003c!-- \/wp:paragraph --\u003e \u003cbr\u003e\n\u003cp\u003e \u003c\/p\u003e","published_at":"2020-05-08T16:22:02-07:00","created_at":"2020-05-08T12:51:48-07:00","vendor":"MAXDEPTH.tv","type":"","tags":["arnold","Maya","on sale","Photogrammetry","reality capture"],"price":7999,"price_min":7999,"price_max":7999,"available":true,"price_varies":false,"compare_at_price":8999,"compare_at_price_min":8999,"compare_at_price_max":8999,"compare_at_price_varies":false,"variants":[{"id":32038479003748,"title":"Default Title","option1":"Default Title","option2":null,"option3":null,"sku":"1007","requires_shipping":false,"taxable":false,"featured_image":null,"available":true,"name":"Drones \u0026 Photogrammetry: Reality Capture Volume One","public_title":null,"options":["Default Title"],"price":7999,"weight":0,"compare_at_price":8999,"inventory_management":null,"barcode":"","requires_selling_plan":false,"selling_plan_allocations":[]}],"images":["\/\/www.maxdepth.tv\/cdn\/shop\/products\/MAXDEPTH_DronePhotogrammetry_InstaMain.jpg?v=1589015494"],"featured_image":"\/\/www.maxdepth.tv\/cdn\/shop\/products\/MAXDEPTH_DronePhotogrammetry_InstaMain.jpg?v=1589015494","options":["Title"],"media":[{"alt":null,"id":6630716375140,"position":1,"preview_image":{"aspect_ratio":1.333,"height":360,"width":480,"src":"\/\/www.maxdepth.tv\/cdn\/shop\/products\/hqdefault.jpg?v=1588976306"},"aspect_ratio":1.334,"external_id":"r5ofwu5Jogc","host":"youtube","media_type":"external_video"},{"alt":null,"id":6629814763620,"position":2,"preview_image":{"aspect_ratio":1.0,"height":720,"width":720,"src":"\/\/www.maxdepth.tv\/cdn\/shop\/products\/MAXDEPTH_DronePhotogrammetry_InstaMain.jpg?v=1589015494"},"aspect_ratio":1.0,"height":720,"media_type":"image","src":"\/\/www.maxdepth.tv\/cdn\/shop\/products\/MAXDEPTH_DronePhotogrammetry_InstaMain.jpg?v=1589015494","width":720}],"requires_selling_plan":false,"selling_plan_groups":[],"content":"\u003cp\u003e \u003c\/p\u003e\n\u003cp\u003eChapter 1) Intro and disclaimer\u003c\/p\u003e\n\u003cp\u003eChapter 2) Inflight drone image capture walk through\u003c\/p\u003e\n\u003cp\u003eChapter 3) Image prep in Adobe Lightroom\u003c\/p\u003e\n\u003cp\u003eChapter 4) Reality Capture \u0026amp; control point workflow\u003c\/p\u003e\n\u003cp\u003eChapter 5) Mesh reconstruction \u0026amp; cleanup\u003c\/p\u003e\n\u003cp\u003eChapter 6) Generating UV's \u0026amp; textures\u003c\/p\u003e\n\u003cp\u003eChapter 7) Zbrush retopology with Zremesher\u003c\/p\u003e\n\u003cp\u003eChapter 8) Zbrush retopology with Dynamesh\u003c\/p\u003e\n\u003cp\u003eChapter 9) Zbrush Uvmaster using Polygroups\u003c\/p\u003e\n\u003cp\u003eChapter 10) Finalizing UV's with Headus and Maya\u003c\/p\u003e\n\u003cp\u003eChapter 11) Generating displacement maps in Zbrush\u003c\/p\u003e\n\u003cp\u003eChapter 12) Final remodeling and touchups in Maya\u003c\/p\u003e\n\u003cp\u003eChapter 13) Final texture touchups in Mari\u003c\/p\u003e\n\u003cp\u003eChapter 14) Final render in Arnold for Maya\u003cbr\u003e\u003c\/p\u003e\n\u003cp\u003e \u003c\/p\u003e\n\u003cp\u003eHello, this is Timothy Hanson from Maxdepth.tv, and today we are going to be focusing on using drones as a tool to create some fantastic 3d assets. In this training series, we will focus on using the DJI Mavic 2 pro as well as traditional DSLRs to capture a data set for use in photogrammetry software Reality Capture.\u003c\/p\u003e\n\u003cbr\u003e\n\u003cp\u003eFrom there I will show you how to implement what I like to call \"The control point method\" to align your data set into a beautiful point cloud as well as some tips and tricks to help optimize your scenes. From there we will head on over into Zbrush for some retopology techniques using Zremesher and Dynamesh, as well as a system for harnessing the power of polygroups to organize our UV's.\u003c\/p\u003e\n\u003cbr\u003e\n\u003cp\u003eNext we will jump into Maya for a demonstration on remodeling some problem areas of our mesh. The next step is to work on some final UV tweaking and layout before taking our textures into Mari for some finishing touches.\u003c\/p\u003e\n\u003cbr\u003e\n\u003cp\u003eClosing things out we'll have a walk through in Maya taking everything we've created and using it to build a photorealistic shader network in Arnold that looks so realistic you'd have never guessed it started with a drone. Head on over to maxdepth.tv to pick up your copy of \"Drones \u0026amp; Photogrammetry\" today. Thanks! \u003c\/p\u003e\n\u003cbr\u003e\u003c!-- wp:paragraph --\u003e \u003cbr\u003e\n\u003cp\u003eYou can view the trailer at \u003ca href=\"https:\/\/vimeo.com\/379730542\"\u003ehttps:\/\/vimeo.com\/379730542\u003c\/a\u003e\u003c\/p\u003e\n\u003cbr\u003e\u003c!-- \/wp:paragraph --\u003e\n\u003cp\u003e\u003c!-- wp:paragraph --\u003e \u003cbr\u003e\u003c\/p\u003e\nAs always we encourage you to follow us on social media! You can find us on Facebook, Twitter, and Instagram. If you have any questions about this or any of our other tutorials feel free to send us an email. \u003cbr\u003e\u003c!-- \/wp:paragraph --\u003e \u003cbr\u003e\n\u003cp\u003e \u003c\/p\u003e"}
-
{"id":4626626150500,"title":"Vray for Maya: Advanced Training","handle":"vray-for-maya-advanced-training","description":"\u003cp\u003eVray 3.1 for Maya: Advanced Production Workflow and Techniques is an in depth training series from VFX Supervisor Timothy Hanson with over 5 hours of advanced training covering major topics such as…\u003c\/p\u003e\n\n\u003cp\u003eVray Frame Buffer\n\u003cbr\u003eSettings\n\u003cbr\u003eGlobal Options\n\u003cbr\u003eImage Sampler\n\u003cbr\u003eRender elements\n\u003cbr\u003eRT Engine\n\u003cbr\u003eVray Proxy (creation and export)\n\u003cbr\u003eVray Volume Grid (opendVDB)\n\u003cbr\u003eObject Property Nodes\n\u003cbr\u003eVray Fur\n\u003cbr\u003eVray Displacement\n\u003cbr\u003eLighting (Dome, Area, Point, IES, Sun, Mesh-light)\n\u003cbr\u003eShaders (Standard MTL, Blend, SSS, Light Material, MTL Wrapper)\n\u003cbr\u003ePhysical Camera\u003c\/p\u003e\u003cbr\u003e--\u003cbr\u003e\u003cp\u003eVray for Maya: Advanced Production Techniques\u003c\/p\u003e","published_at":"2020-05-08T18:07:36-07:00","created_at":"2020-05-08T12:51:45-07:00","vendor":"MAXDEPTH.tv","type":"","tags":["Maya","on sale","Vray"],"price":1999,"price_min":1999,"price_max":1999,"available":true,"price_varies":false,"compare_at_price":5999,"compare_at_price_min":5999,"compare_at_price_max":5999,"compare_at_price_varies":false,"variants":[{"id":32038478676068,"title":"Default Title","option1":"Default Title","option2":null,"option3":null,"sku":"1001","requires_shipping":false,"taxable":true,"featured_image":null,"available":true,"name":"Vray for Maya: Advanced Training","public_title":null,"options":["Default Title"],"price":1999,"weight":0,"compare_at_price":5999,"inventory_management":null,"barcode":"","requires_selling_plan":false,"selling_plan_allocations":[]}],"images":["\/\/www.maxdepth.tv\/cdn\/shop\/products\/LesterAD_001.jpg?v=1588967513"],"featured_image":"\/\/www.maxdepth.tv\/cdn\/shop\/products\/LesterAD_001.jpg?v=1588967513","options":["Title"],"media":[{"alt":null,"id":6629814206564,"position":1,"preview_image":{"aspect_ratio":1.36,"height":250,"width":340,"src":"\/\/www.maxdepth.tv\/cdn\/shop\/products\/LesterAD_001.jpg?v=1588967513"},"aspect_ratio":1.36,"height":250,"media_type":"image","src":"\/\/www.maxdepth.tv\/cdn\/shop\/products\/LesterAD_001.jpg?v=1588967513","width":340}],"requires_selling_plan":false,"selling_plan_groups":[],"content":"\u003cp\u003eVray 3.1 for Maya: Advanced Production Workflow and Techniques is an in depth training series from VFX Supervisor Timothy Hanson with over 5 hours of advanced training covering major topics such as…\u003c\/p\u003e\n\n\u003cp\u003eVray Frame Buffer\n\u003cbr\u003eSettings\n\u003cbr\u003eGlobal Options\n\u003cbr\u003eImage Sampler\n\u003cbr\u003eRender elements\n\u003cbr\u003eRT Engine\n\u003cbr\u003eVray Proxy (creation and export)\n\u003cbr\u003eVray Volume Grid (opendVDB)\n\u003cbr\u003eObject Property Nodes\n\u003cbr\u003eVray Fur\n\u003cbr\u003eVray Displacement\n\u003cbr\u003eLighting (Dome, Area, Point, IES, Sun, Mesh-light)\n\u003cbr\u003eShaders (Standard MTL, Blend, SSS, Light Material, MTL Wrapper)\n\u003cbr\u003ePhysical Camera\u003c\/p\u003e\u003cbr\u003e--\u003cbr\u003e\u003cp\u003eVray for Maya: Advanced Production Techniques\u003c\/p\u003e"}
